After the room it´s controlled we will choose the final acoustic, drier or alive. You can add or remove absorbers of the room, never from first reflections points except back wall or ceiling, (if your back wall it´s less than 2m put absorbers) use the rest of the room, back ceiling and rear side walls are good places.
Using diffusers you will improve the acoustic. They add ambient and spatiality in a controlled way. A better natural sound. There are studios using variable panels like vari panel.
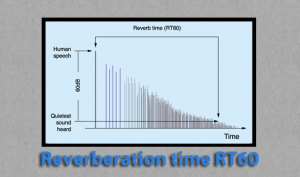
Choose your ideal ambient. I prefer a very accurate sound in my room with a slightly dry acoustic, about 0,2s and a touch of liveness with diffusers.
Try diffusion on rear side walls, back wall, ceiling and front wall.
RPG Skyline works really fine. I like a lot on the back wall. On rear side walls and the front wall, you can use QRD. On the ceiling, you can try with skyline too.
Best way to find a great acoustic it´s trying and experimenting in your room, put here and there, measure the room and listen to some of your reference tracks, change or mix different type of diffusers here and there, take notes.
Tip: You can use absorbers behind diffusers. They will absorb low frequencies while diffusers will reflect mids and highs.


